As a landscape photographer, I often do not want people in my photo. These days many of the photography spot that I want to shoot are rarely empty. This technique is handy to remove people from the photo.
This requires Photoshop rather than light room as we are going to do some mathmatical magic on image stacks.
Median
The Median is a mathematical average. It is calculated by putting all the values in a sorted list and picking the middle element. If there are two (as there were an even number of elements), then we add the two together. We then divide by two.
For images, if we have a constant background, and people appearing in single frames. Then this will remove the people. This will work best for an odd number of images.
Example – Balmoral Gardens
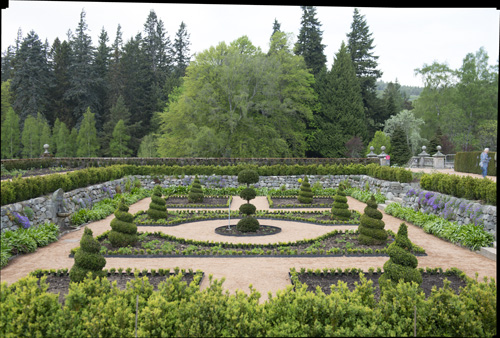
We are going to start with some photos I took whilst on holiday. They are of the Sunken Garden at Balmoral


The photos above all have people in them. The couple on the right of the image appears in multiple photos so would cause an issue. I want to crop the image just to the left of the metal gate. So, this problem goes away.
Steps
1. Export the images from Lightroom
We want all the images (unprocessed) exported at high quality so that we can use them in Photoshop. I export them with the following settings:
| Export to: | Specific folder |
| Put in SubFolder | Median |
| Image format | TIFF |
| Compression | None |
| Color Space | Adobe RGB (1998) |
| Bit Depth | 16 bits/component |
2. Load them into Photoshop
This step actually does the magical median filtering too!. First of all we want to get the images into Photoshop, so lets start by opening Photoshop.
Goto File>Scripts>Statistics… . This will bring up the dialog we need to select and handle the images.
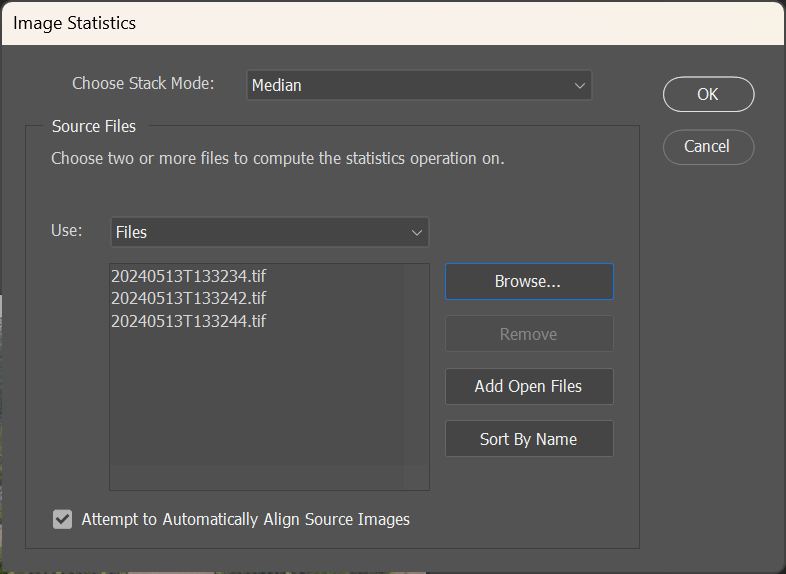
Select Median in the top box (if not already selected).
Load the files by clicking browse and selecting the folder you have exported your files to. Or select files and choose just the files you want.
Remember that ideally you want an odd number of images, where there are no overlapping people.
If you shot your photos from a tripod you will not need to select the “Attempt to Automatically Align Source Images”. I shot these hand held so aligning them is needed.
Click Ok, and wait for the magic!. Photoshop will take a minute, or two to load, alight and average the images.
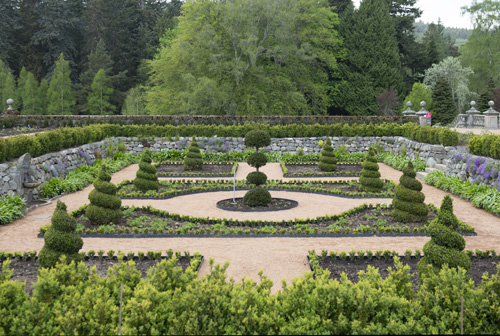
Now we should have an image like this.
Note: That the couple walking across the back of the image are gone. The couple on the right were in 2 of the 3 images, and are still in the median filtered image.
Cropping
And a quick crop to remove the bits that I dont want.
Bringing back into Lightroom
I save the file as a .tiff file and reimport that into Light room to continue the editing process.
Conclusion
It is not always possible to get great photo spots to yourself. This method is simple, and quite quick, and helps remove the people. It is not without its draw backs, as it needs multiple photos. There will also be issues with moving objects like flags.

You must be logged in to post a comment.